How to Do an Image Transfer on Encaustic
Aug 13, 2026
Let's be honest, sometimes we sit down to create and the inspiration just isn't flowing. Or we don't feel like building something from scratch that day. Sound familiar?
That's where image transfers come in, and they are one of my favourite things to do in encaustic. So many possibilities to transform your work without having to wait for creativity to arrive on schedule. They can look absolutely stunning especially if you lean into a worn, vintage look by purposely rubbing parts of the image away. But getting there requires a few specific steps or it can get frustrating fast.
What you need to know before you start
First, I highly suggest using photos you've taken rather than something found online. Personal images create real meaning and connection in your artwork and while there are stock image sites out there, it's more exciting and authentic to use your own. They can be abstract or representational.
The printer and paper
You really need a laser (toner) printer for optimal results. The cheapest copier paper is all you need, there's no reason to buy expensive premium paper. Plain copy paper does the job perfectly.
Transferring the image to your encaustic
Now you're ready to transfer. Here's the process step by step:
1. Prepare your panel. Start with a panel that already has several layers of encaustic medium. If you've used an encaustic paint colour, go over it with a thin coat of medium first, this prevents colour bleed on the final fuse. Make sure the panel is slightly warm, not cold. The warmth helps the paper set properly.
2. Cut out your image closely. Trim as close to the picture as possible to reduce unnecessary excess paper around the edges.
3. Burnish slowly and thoroughly. Place the image face down on your surface and put a piece of glassine, wax paper, or tracing paper on top. Use a spoon or bone folder to burnish with real pressure. This step prevents lifting of the ink, so take your time. The better your burnishing, the less likely your image is to tear or rub off during removal.
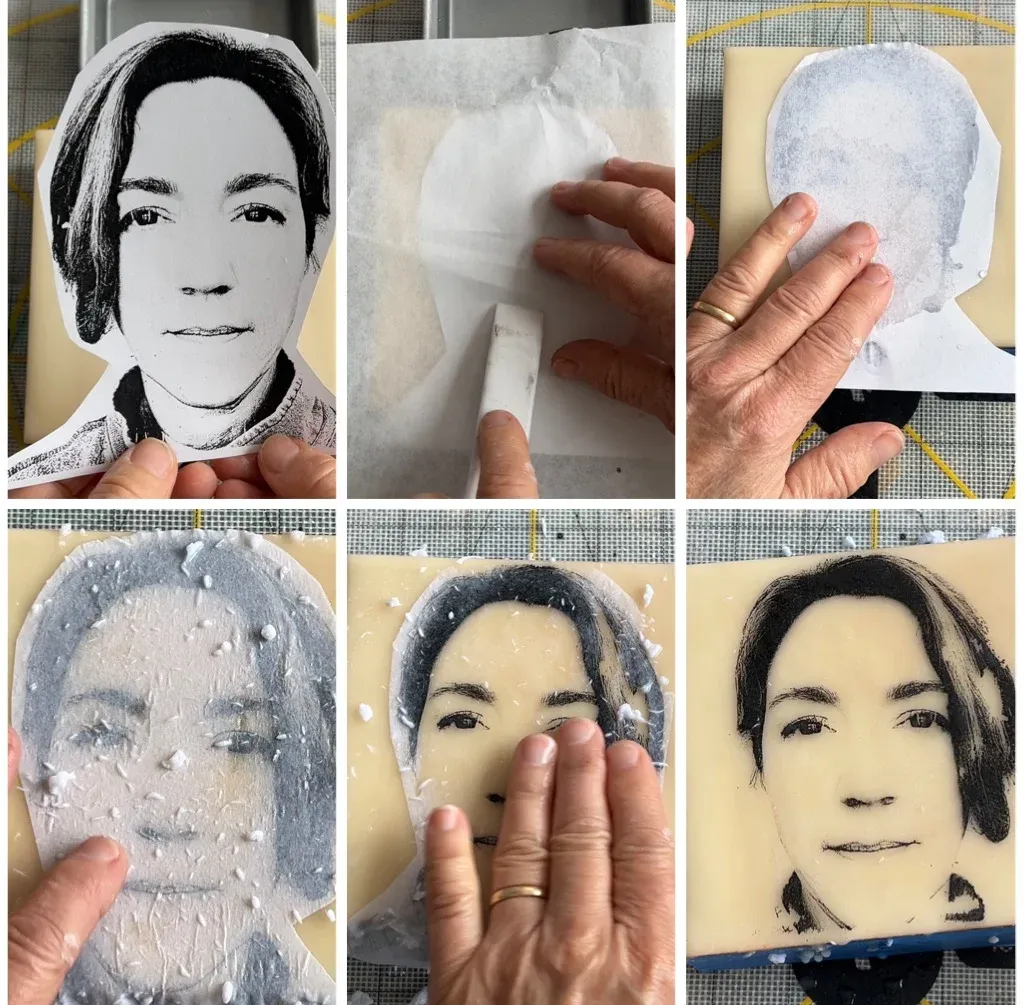
4. Wet and rub away the paper. Drop a little water onto the paper and let it soak in. Then gently start rubbing away the fibres. This step takes patience, rushing is a surefire way to get lousy results. A gentle touch is essential. Add a little more water if things start drying out. Keep removing paper until the surface feels smooth and no fibres remain. You'll still see a white hazy residue if you haven't fully removed it all, so keep going until everything feels smooth against the wax.
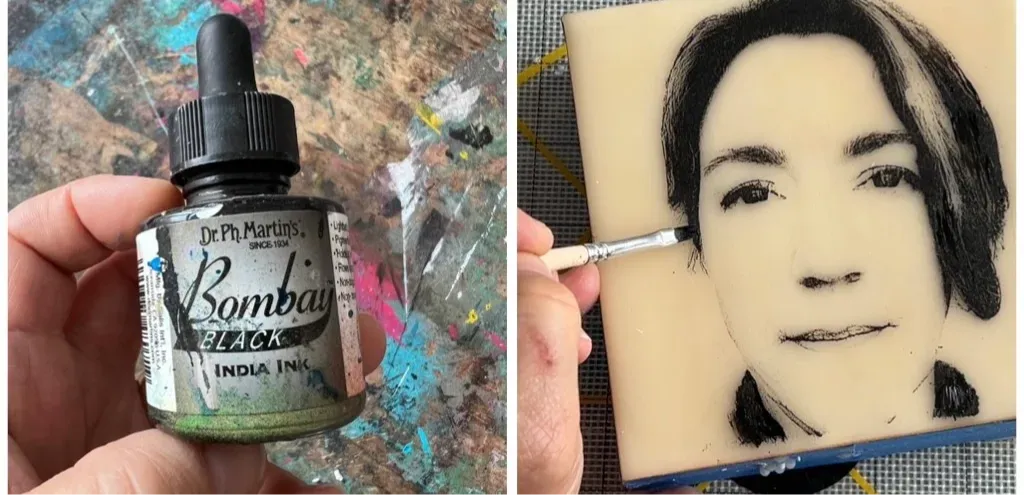
5. Fix any spots before your final fuse. If the transfer didn't take in a small area (often happens if you rushed through burnishing), India ink is a great fix. Dr. Ph. Martin Bombay inks come in lots of permanent, archival colours — a little dab with a brush and you can remedy small areas easily.
The final fuse
For your final fuse, ensure the wax seeps through to the surface. This hides any remaining white fibre and allows the image to become seamless, that's how you know it's done and you'll get that gorgeous encaustic glow.
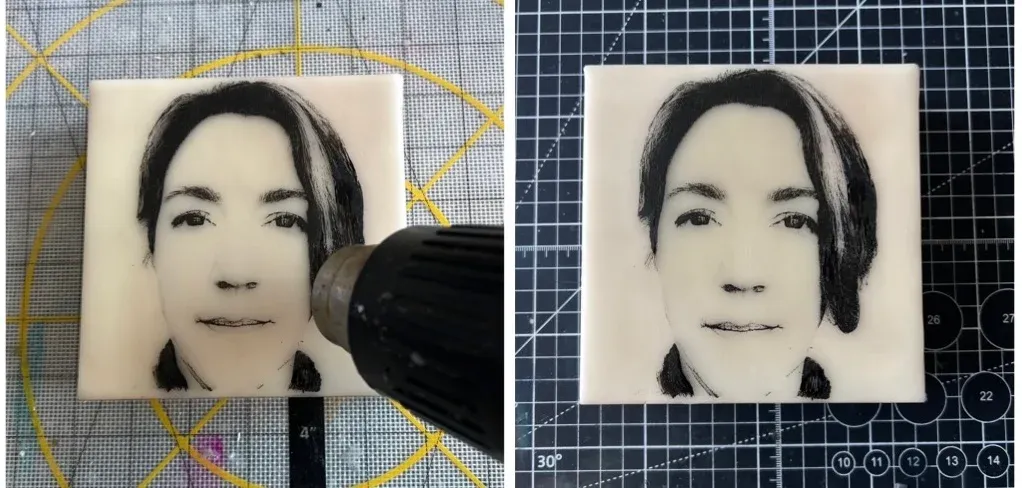
After the transfer
You can leave it as your final piece or continue to layer with paint and medium. The choice is yours.
Don't be discouraged if it doesn't work perfectly the first couple of tries, this technique has a bit of a learning curve, just like everything in encaustic. If it goes wrong, you can scrape it back and start again. That's one of the best things about working in wax.
The more you practice, the more natural it becomes. And when it works, it's incredibly satisfying.
Until next time, stay creative.
xo Jane.