It's packed with info, Rhonda. So this is part one of two. ‌ ‌ ‌ ‌ ‌ ‌ ‌ ‌ ‌ ‌ ‌ ‌ ‌ ‌ ‌ ‌ ‌ ‌ ‌ ‌ ‌ ‌ ‌ ‌ ‌ ‌ ‌ ‌ ‌ ‌ ‌ ‌ ‌ ‌ ‌ ‌ ‌ ‌ ‌ ‌ ‌ ‌ ‌ ‌ ‌ ‌ ‌ ‌ ‌ ‌ ‌ ‌ ‌ ‌ ‌ ‌ ‌ ‌ ‌ ‌ ‌ ‌ ‌ ‌ ‌ ‌ ‌ ‌ ‌ ‌ ‌ ‌ ‌ ‌ ‌ ‌ ‌ ‌ ‌ ‌ ‌ ‌ ‌ ‌ ‌ ‌ ‌ ‌ ‌ ‌ ‌ ‌ ‌ ‌ ‌ ‌ ‌ ‌ ‌ ‌ ‌ ‌ ‌ ‌ ‌ ‌ ‌ ‌ ‌ ‌ ‌ ‌ ‌ ‌ ‌ ‌ ‌ ‌ ‌ ‌ ‌ ‌ ‌ ‌ ‌ ‌ ‌ ‌ ‌ ‌ ‌ ‌ ‌ ‌ ‌ ‌ ‌ ‌ ‌ ‌ ‌ ‌ ‌ ‌ ‌ ‌ ‌ ‌ ‌ ‌ ‌ ‌ ‌ ‌ ‌ ‌ ‌ ‌ ‌ ‌ ‌ ‌ ‌ ‌ ‌ ‌ ‌ ‌ ‌ ‌ ‌ ‌ ‌ ‌ ‌ ‌ ‌ ‌ ‌ ‌ ‌ ‌ ‌ ‌ ‌ ‌ ‌ ‌ ‌ ‌ ‌ ‌ ‌ ‌ ‌ ‌ ‌ ‌ ‌ ‌ ‌ ‌ ‌ ‌ ‌ ‌ ‌ ‌ ‌ ‌ ‌ ‌ ‌ ‌ ‌ ‌ ‌ ‌ ‌ ‌ ‌ ‌ ‌ ‌ ‌ ‌ ‌ ‌ ‌ ‌ ‌ ‌ ‌ ‌ ‌ ‌ ‌ ‌ ‌ ‌ ‌ ‌ ‌ ‌ ‌ ‌ ‌ ‌ ‌ ‌ ‌ ‌ ‌ ‌ ‌ ‌ ‌ ‌ ‌ ‌ ‌ ‌ ‌ ‌ ‌ ‌ ‌ ‌ ‌ ‌ ‌ ‌ ‌ ‌ ‌ ‌ ‌ ‌ ‌ ‌ ‌ ‌ ‌ ‌ ‌ ‌ ‌ ‌ ‌ ‌ ‌ ‌ ‌ ‌ ‌ ‌ ‌ ‌ ‌ ‌ ‌ ‌ ‌ ‌ ‌ ‌ ‌ ‌ ‌ ‌ ‌ ‌
View in Web Browser

Hi Rhonda,

This week, and next, I'm talking all about imitation gold leaf and the correct way to use it in your artwork.

I love the different effects certain golds can produce and I have used almost every product there is. 

Imitation gold leaf is no exception. You may have used it, or considered it, but weren't exactly sure how or what to apply.

It's fairly easy to use but there are a few things you really need to know when it comes to the imitation stuff. (Also known as dutch gold)

I briefly discussed imitation gold leaf and real gold leaf supplies in my free Ultimate Gold Supply Guide,

Gold Leaf products

Recently, I've taken to applying metallic methods on the edges of my art. Normally I'm a plain Jane (he he) and stick with the natural raw wood look. But I've fallen back in love with adding more bling to the overall look and feel of my work.

It's not all gold. I've been adding colour mixed with metallics and even patinas to the sides. These are some examples of what we cover in my Fused Harmony course (opening Feb 21st). 

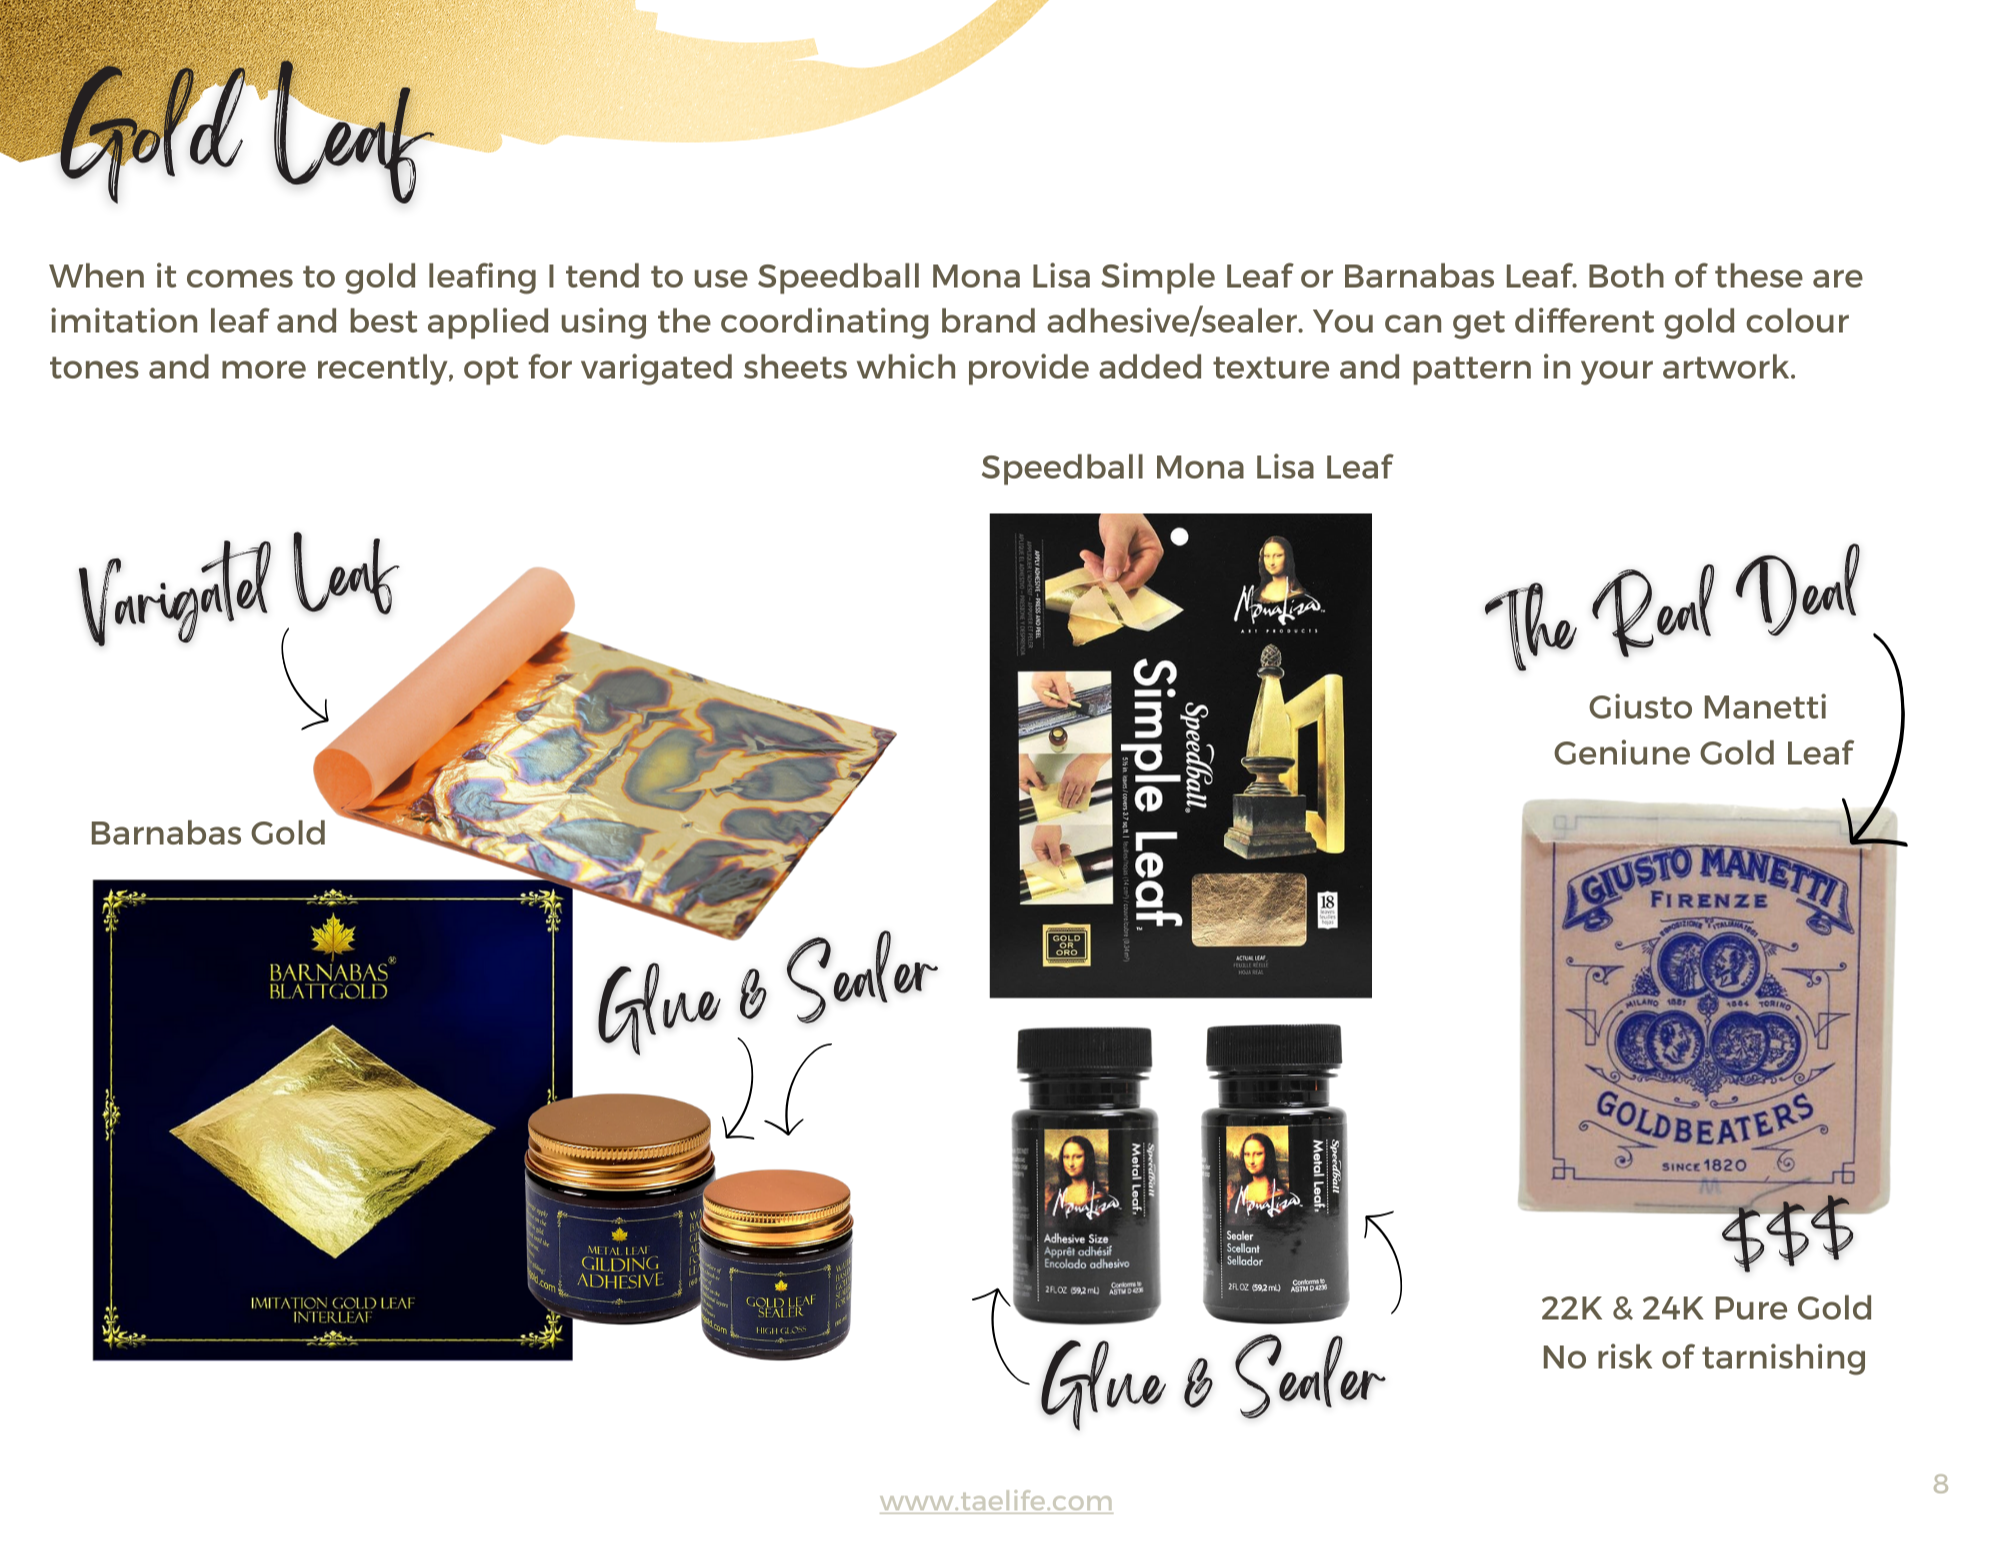
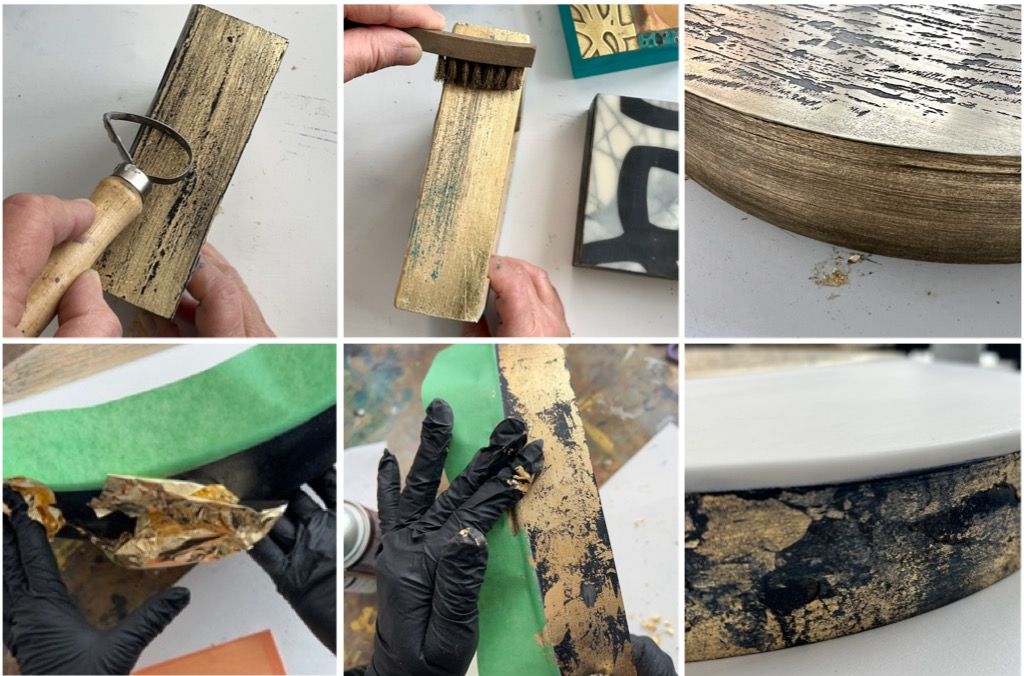
Imitation leaf is comprised of copper and zinc. Because it's not pure gold, it's subject to oxidation and will tarnish. So sealing is a must. (Pure gold leaf doesn't tarnish but it's very expensive).

STEP 1 - Prepping your panel

I work mainly on wood panels and, often times, the sides need sanding and sealing. I use GOLDEN GAC100 before applying anything to my edges.

I say this for two reasons.

First, depending on the surface you apply gold leaf, results will vary. Smooth surfaces will provide a shinier result, whereas a textured or rougher surface will make the leaf appear more matte.

This may be your desired result. Either way, think about your surface and if any preparation is required, prior to application.

Second, the leaf adhesive is in liquid form and it soaks into the wood almost immediately. Sealing prevents this from happening. So make this your first step if you're using wood panel as your substrate.

After your GAC100 is dry, you can move onto to applying the adhesive or adding some colour with acrylic paint.

I recommend this step because you're likely going to have some minor imperfections which will cause the base layer to become exposed. You may want this effect anyway. 

STEP 2 - The Adhesive 

Tip 1 - Pour it into a larger container. It's much easier than trying to cram a brush into the little bottle.

Tip 2 - Work with a slightly damp flat bristle brush. It makes the application of the adhesive smoother overall. Blot your brush off onto a paper towel to ensure you don't transfer water into the glue. 

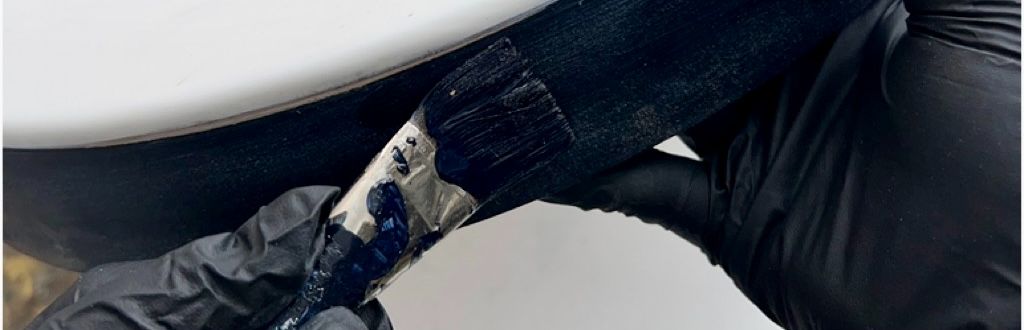
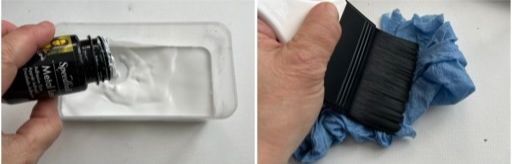
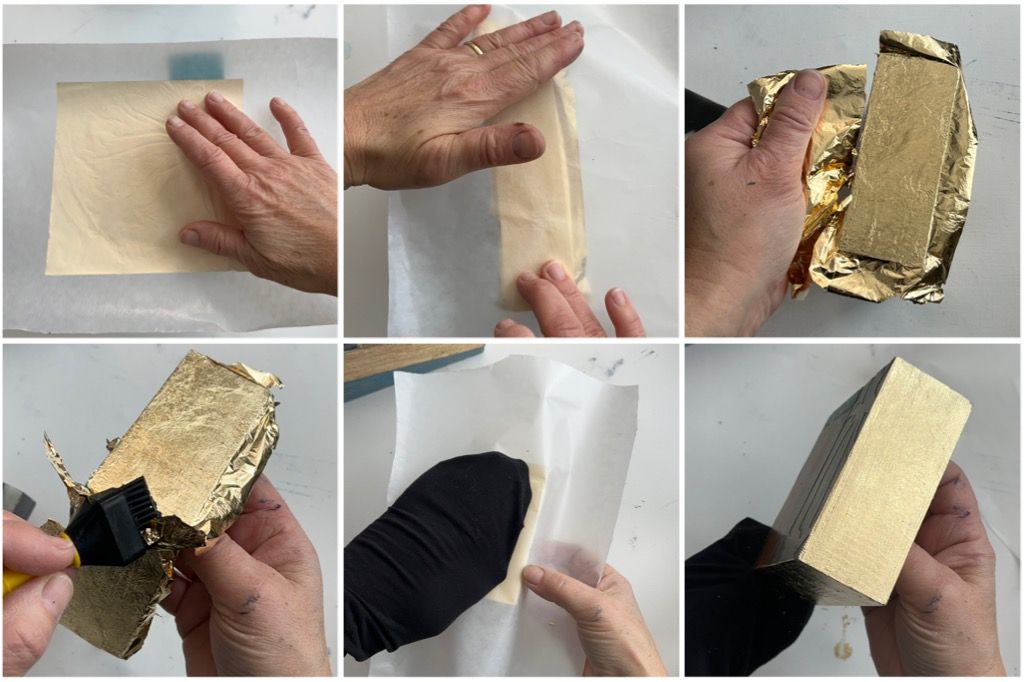
Brush and cover your surface or sides, with a thin layer. A little bit goes a long way. When you're finished, allow it to become tacky. The feeling will be similar to that of scotch tape. If it's not tacky when dry, apply another coat.

STEP 3 - Leaf Application

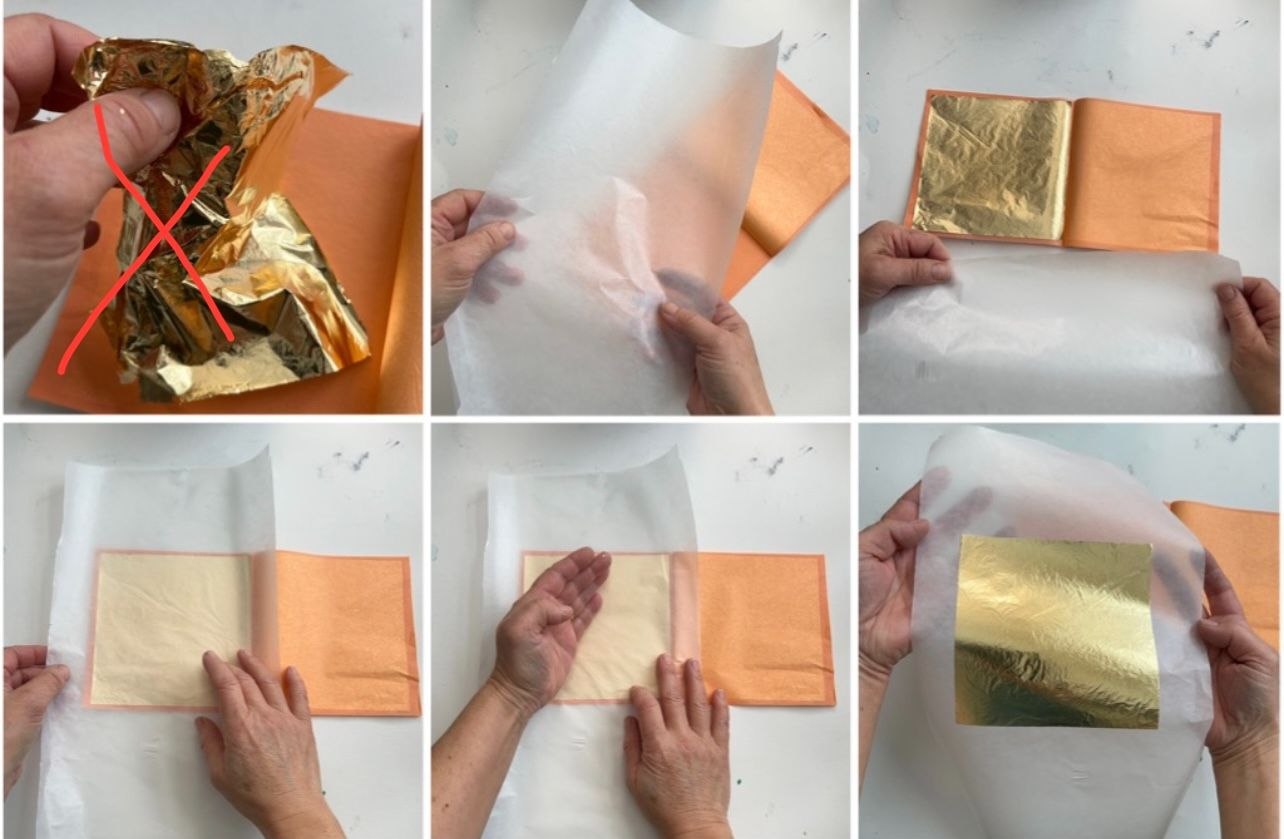
If you've tried leafing, you probably realized very quickly, how delicate it is. Picking it up with your hand scrunches and tears it, making it difficult to smooth out and place on to your tacky surface.

You can see in the first photo (with the red X) how easily it crumpled from picking it up with my finger and thumb.

Tip 3 - Use a piece of wax paper (or glassine) to pick it up.

Place the paper over a gold leaf square. The wax paper will stick, like static, to the leaf and you can gently smooth it out with the back of your hand. 

When you lift your wax paper, the square stays on, ready to be transferred to your panel. 

It's also easy to see where you're placing the leaf when it's on the wax paper. 

Gently drop the leaf onto the surface. It's good to overlap instead of trying to align it exactly to the edge. Press and smooth with your hand before pulling away the wax paper.

Carefully tear away the overlapping pieces and either store back in your pack, or continue adding to another side. Once all edges are covered, take another stiff bristle brush and remove the excess. 

Tip 4 - Place your wax paper back over the leafed surface and burnish. You can do this with a soft paper towel, cheesecloth, or even a stocking. 

This will leave you with a with a nice smooth finish! 

Tip 5 - Gold bits tend to fly all over the place and get stuck on other things. Take a piece of tape and, using the sticky side, wipe away flakes from any surfaces that need cleaning.

Alternatively, you may decide you want a distressed or textured look instead. You can purposely apply the leaf without care.

And (bonus tip) mark the leaf using scraping tools or even a metal bristle brush to give you different results. (This is why painting the base with a colour is important)

FYI: I would also wear a dust mask here to prevent any chance of breathing in any particles.

From here. we can add more paint effects or leave it as is. Either way, we MUST seal it or it will tarnish and dull quickly.

There are a number of different products you can use for sealing. But as usual, some perform better than others.

For ultimate results, there is ONE specific product that will make your work last longer.

And, I'll show you that next week!

xo Jane.

Unsubscribe | Sent by The Artist Entrepreneur - Jane Monteith Art
Glenhuron • Springwater, ON • L9X 0T8